DXL2 Studio
DXL2 Studio is a desktop application for testing and debugging DYNAMIXEL Protocol 2.0
communication. It is built on the DXL2-C static library itself: every Instruction Packet
it sends is encoded by dxl2_link_send() and every byte it receives goes through
dxl2_link_receive(). What you see in the tool is exactly what the library does.
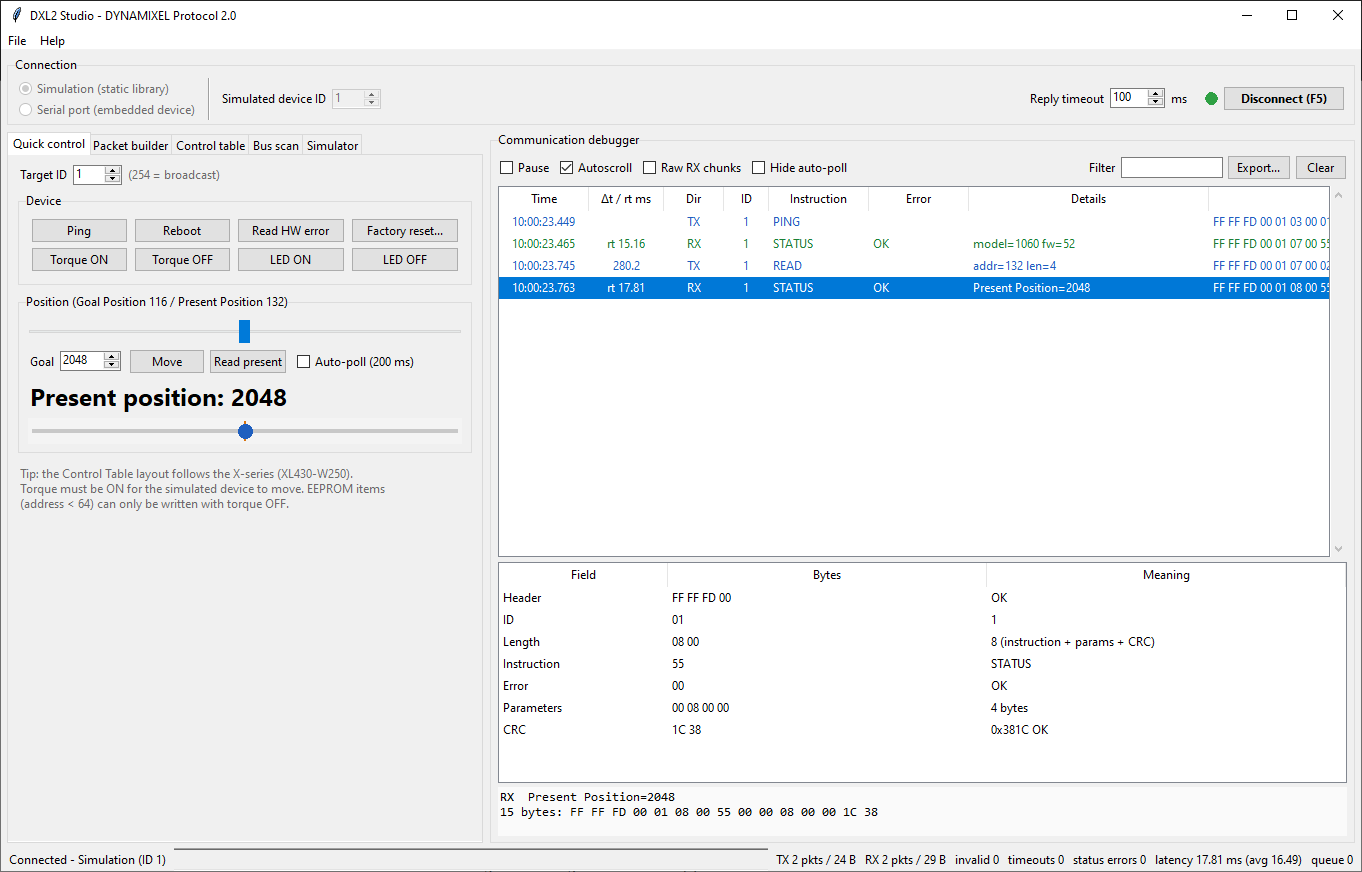
Modes
| Mode | What runs on each side | Hardware |
|---|---|---|
| Simulation | The controller and a simulated DYNAMIXEL device (XL430-W250 Control Table) each run the library on their own link | None |
| Serial port | The controller runs on the library and talks to a real device over a COM port: a board with DXL2-C, a U2D2 adapter, or a servo | USB-to-serial adapter |
The simulation makes it possible to learn the protocol, try instructions and test error handling without any hardware. The serial mode turns the same tool into a bus analyzer for your own firmware.
Installation and start
DXL2 Studio needs Python 3.8 or newer with Tkinter, CMake 3.20 or newer and a C11 compiler (GCC/MinGW-w64, Clang or MSVC, with the same bitness as Python).
python -m pip install -r tools/dxl2_gui/requirements.txt   # pyserial, for the serial mode
python tools/dxl2_gui/dxl2_gui.py
On the first start the tool offers to build its native bridge, a shared library that
links the static libdxl2.a. You can also build it by hand:
cmake -S tools/dxl2_gui/native -B tools/dxl2_gui/build
cmake --build tools/dxl2_gui/build --config Release
Command-line options select the mode and connect at once:
python tools/dxl2_gui/dxl2_gui.py --mode sim --id 1 --connect
python tools/dxl2_gui/dxl2_gui.py --mode serial --port COM3 --baud 1000000 --connect
In VS Code, open the task menu (Ctrl+Shift+B), run Python: Setup venv once, then GUI: Run (Simulation) or GUI: Run (Serial port).
On Debian and Ubuntu, install the system packages first and add your user to the
dialout group to use USB serial adapters without root:
sudo apt install python3-venv python3-tk cmake build-essential
sudo usermod -aG dialout $USER   # log out and back in afterwards
Window layout
The window has three areas:
- Connection bar (top): mode, simulated device ID or serial port and baud rate, reply timeout, and the Connect button (F5).
- Control tabs (left): quick control, packet builder, Control Table, bus scan and simulator settings.
- Communication debugger (right): the packet log, the field-by-field breakdown of the selected packet and its raw bytes. The status bar below shows packet and byte counters, invalid packets, timeouts, status errors and latency.
Quick control
Ping, reboot, factory reset, torque and LED on and off, and the Hardware Error Status. A slider sends the Goal Position; Auto-poll reads the Present Position every 200 ms.
Control Table
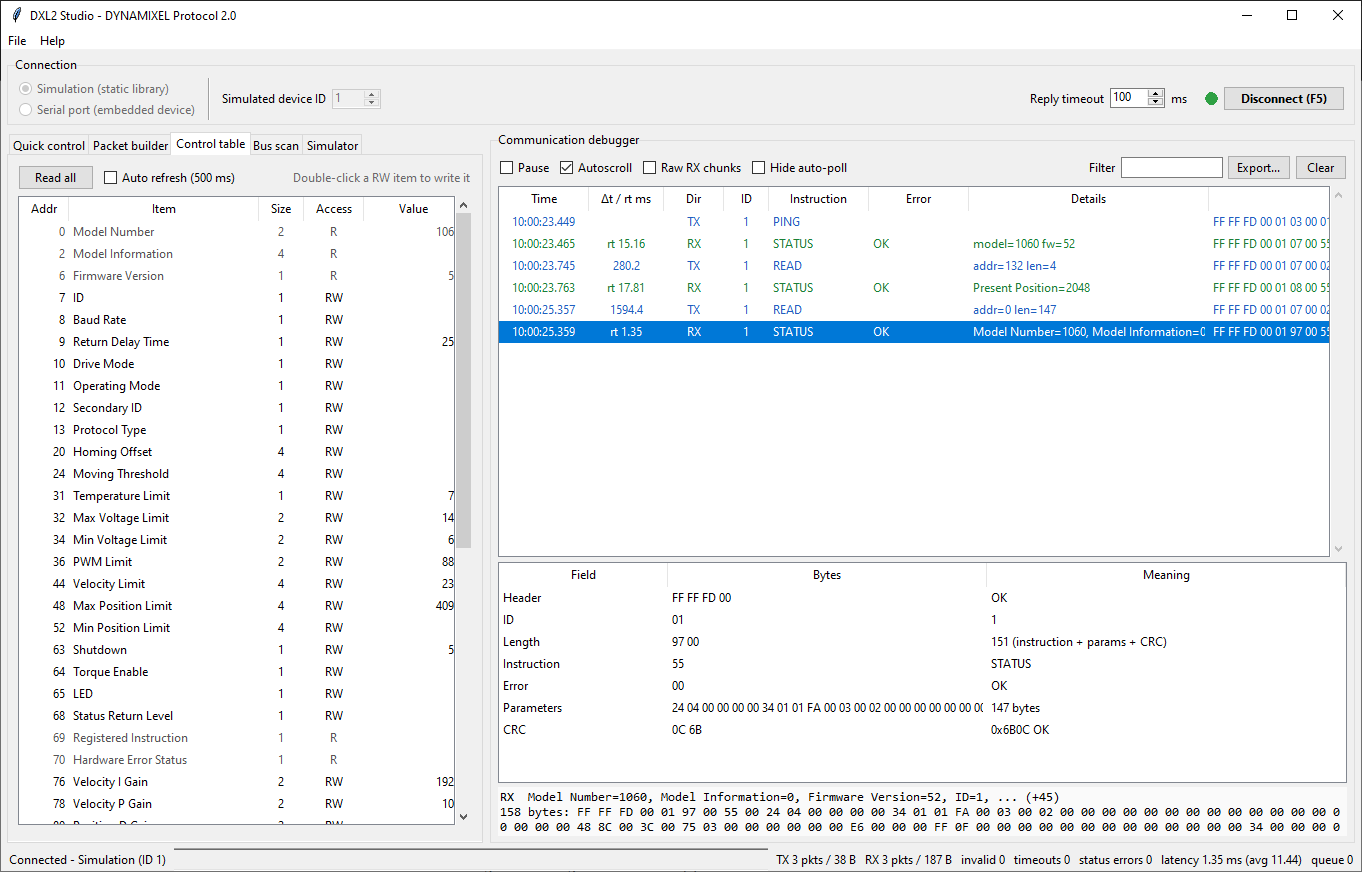
Read all reads every item with one READ instruction. Items whose value changed since the last read are highlighted, and Auto refresh repeats the read every 500 ms. Double-click a read-write item to write a new value. The view uses the X-series layout; for other models use the packet builder.
Packet builder
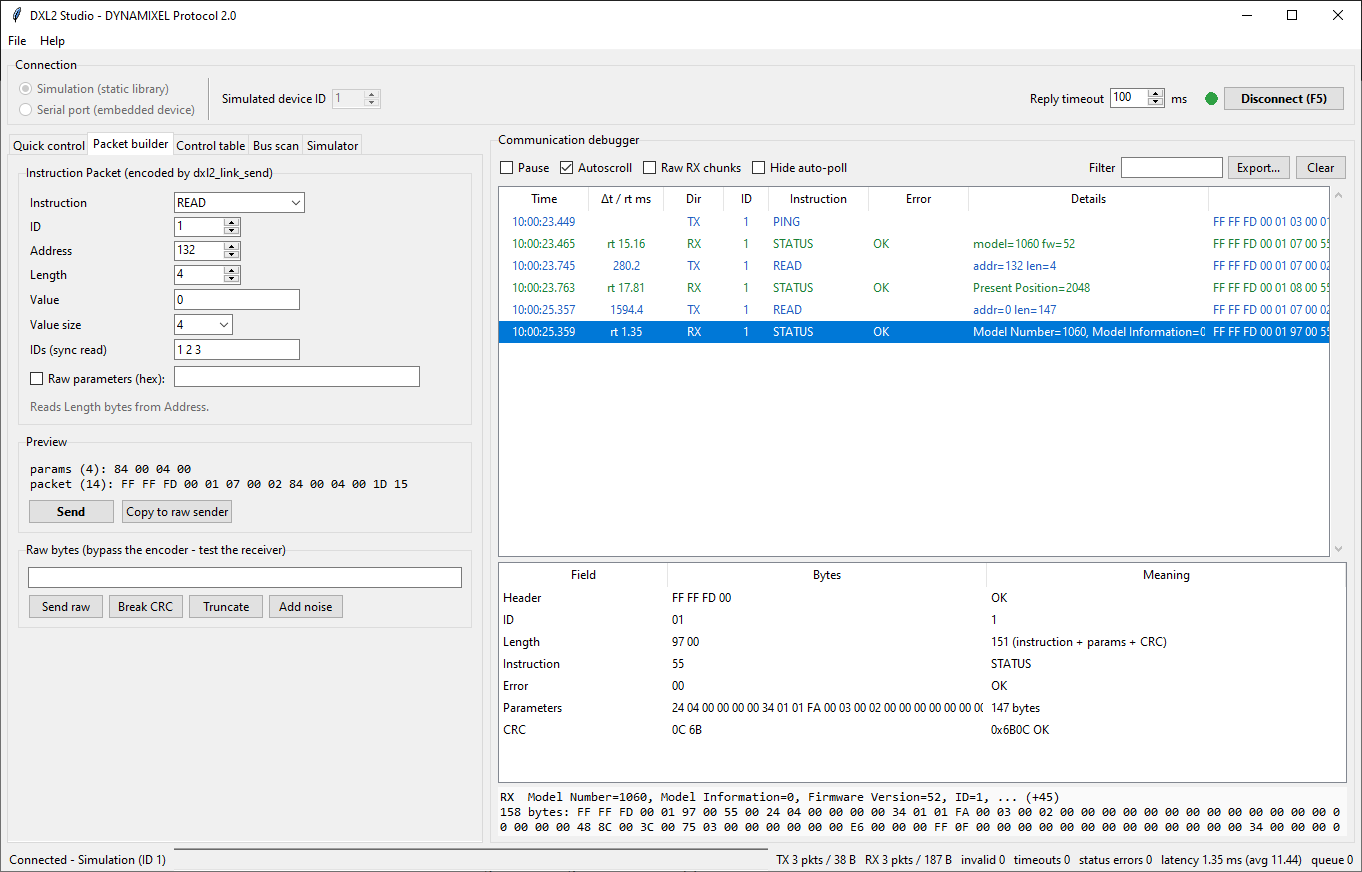
Choose an instruction and fill in its fields — or type raw parameters in hex for SYNC and
BULK instructions — and the preview shows the exact packet that dxl2_encode() produces,
including byte stuffing and CRC.
The Raw bytes sender bypasses the encoder. Its Break CRC, Truncate and Add noise buttons create invalid input, so you can watch how a receiver — the simulated device or your own firmware — rejects it and recovers.
Bus scan
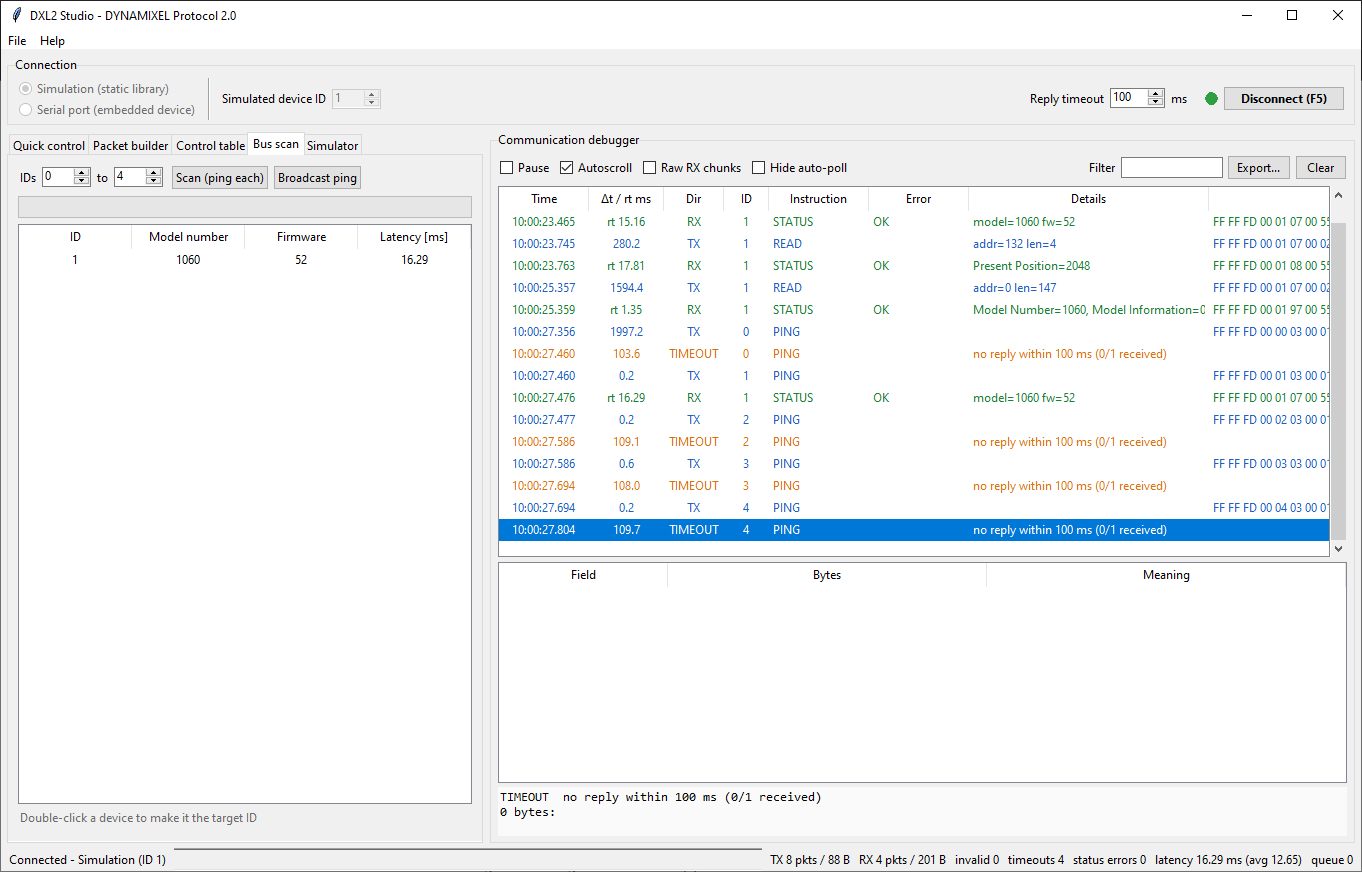
Ping every ID in a range, or send one broadcast PING. The results list the model number, firmware version and latency of every device. Double-click a result to make it the target of the other tabs.
Simulator
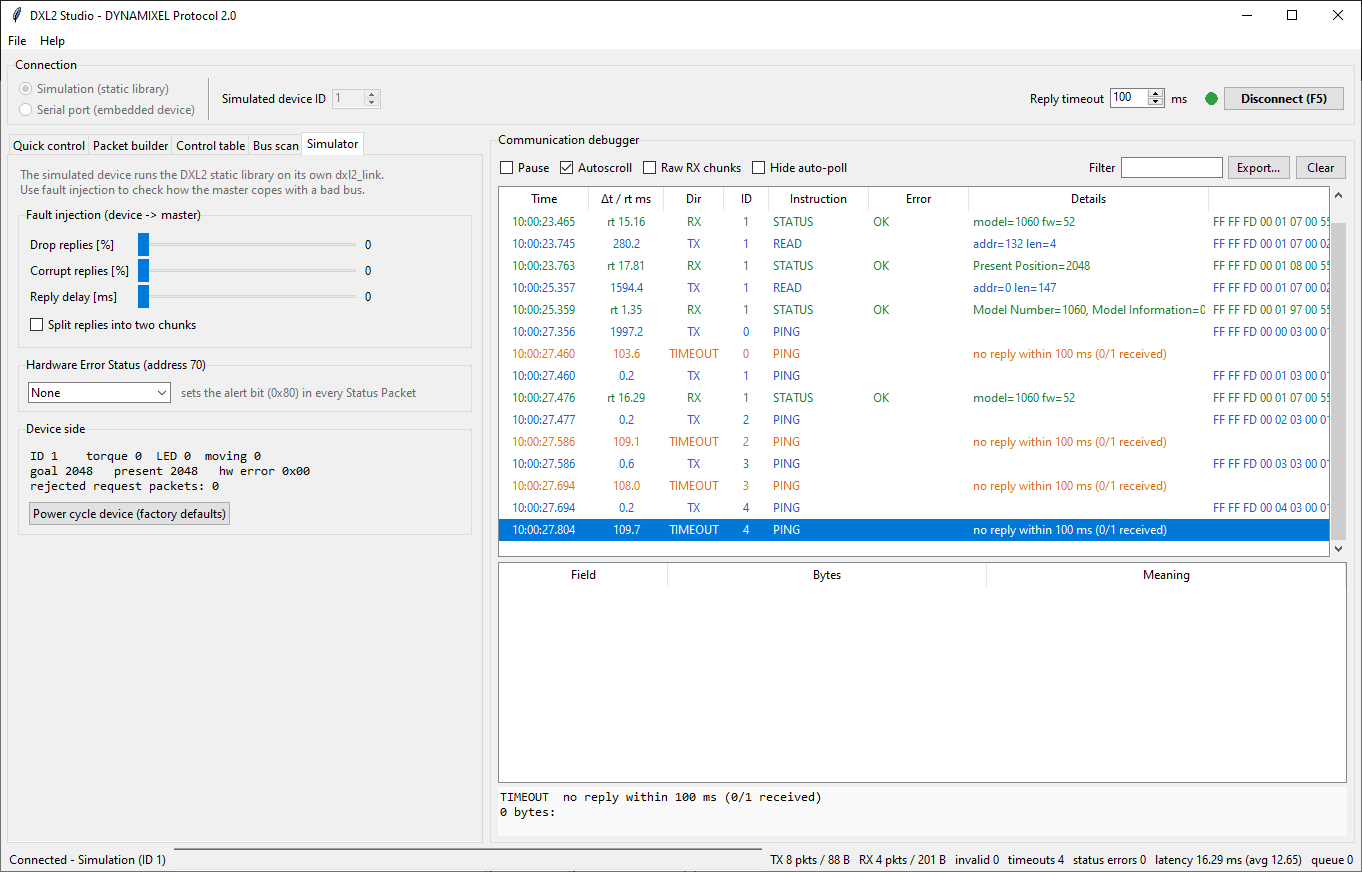
In simulation mode this tab injects faults into the replies of the simulated device: drop a percentage of replies, corrupt one bit, add a delay, or split a reply into two chunks. You can also set a Hardware Error Status (which sets the alert bit in every Status Packet), watch the device state and power-cycle the device.
The simulated device implements PING, READ, WRITE, REG_WRITE/ACTION, FACTORY_RESET, REBOOT, CLEAR, BACKUP, SYNC_READ/WRITE and BULK_READ/WRITE, applies Status Return Level, the EEPROM lock while torque is on, and the ID, torque and LED range checks. It answers FAST_SYNC_READ and FAST_BULK_READ with an Instruction Error.
Communication debugger
Every log entry has a time stamp, the time since the previous entry and, for replies, the
round-trip time (rt). Entries are color coded:
| Entry | Meaning |
|---|---|
| TX | Instruction Packet sent |
| RX | Status Packet received; interpreted against its request (for example Present Position=2048) |
| TIMEOUT | No reply within the reply timeout |
| ERR | Bytes rejected by dxl2_link_receive() — on the controller or on the simulated device |
| INFO | Connection and tool messages |
Select an entry to see it field by field — header, ID, Length check, instruction, error, parameters (with a note when byte stuffing is present) and CRC check. Raw RX chunks shows the bytes exactly as the transport delivered them, before decoding. The log can be filtered, paused, cleared and exported to CSV or text (Ctrl+E).
For serial ports, Discard echo removes your own bytes from the receive stream on
single-wire half-duplex buses, and the port field accepts pyserial URLs such as
socket://192.168.1.10:5000 for serial-over-TCP bridges.
How the tool uses the library
tools/dxl2_gui/
├── dxl2_gui.py          entry point
├── dxl2gui/
│   ├── app.py           Tkinter user interface
│   ├── session.py       request queue, timeouts, statistics, log entries
│   ├── transport.py     simulation and serial transports, fault injection
│   ├── native.py        ctypes binding and CMake build helper
│   └── decode.py        names, packet breakdown, value formatting
└── native/
    ├── dxl2_host.c/.h   controller side: dxl2_link_send / dxl2_link_receive
    ├── dxl2_sim.c/.h    simulated device on its own dxl2_link
    └── CMakeLists.txt   links the static dxl2 target into dxl2_gui_native
The native bridge exports only dxl2_host_* and dxl2_sim_* functions. Python never
depends on the memory layout of the library structures: it asks the bridge for their
sizes and treats them as opaque. dxl2_sim.c is also a useful reference if you write
your own device firmware: it is a complete X-series Control Table on top of the public
API.